What are Halogen Sensors?
A Halogen Sensor or Spot Light Sensor is a High Watt Halogen Light or LED connected with PIR Motion Sensor, these lights are very effective for security purpose. 1 LEAP Technologies today has become a renowned name in the field of Halogen Sensor. With an Expert & an experienced team 1 LEAP always strives to get quality assured products for its clients. All our products are thoroughly checked and only then are dispatched from our warehouse.
How does a Halogen Sensor work?
Halogen sensors are Halogen Light or LED High Watt Focus light connected with PIR Motion Sensors, when some moving object comes in the range of PIR Sensor, the system gets activated and lights ON the Halogen or LED’s. When the object moves out of range after preset time the light switches OFF. These sensors lights are very effective for security purpose. Halogen Sensors are a great energy Saving device, and very effective for Security purpose, to frighten away unwanted intruders.
Model No. 1L-HS03
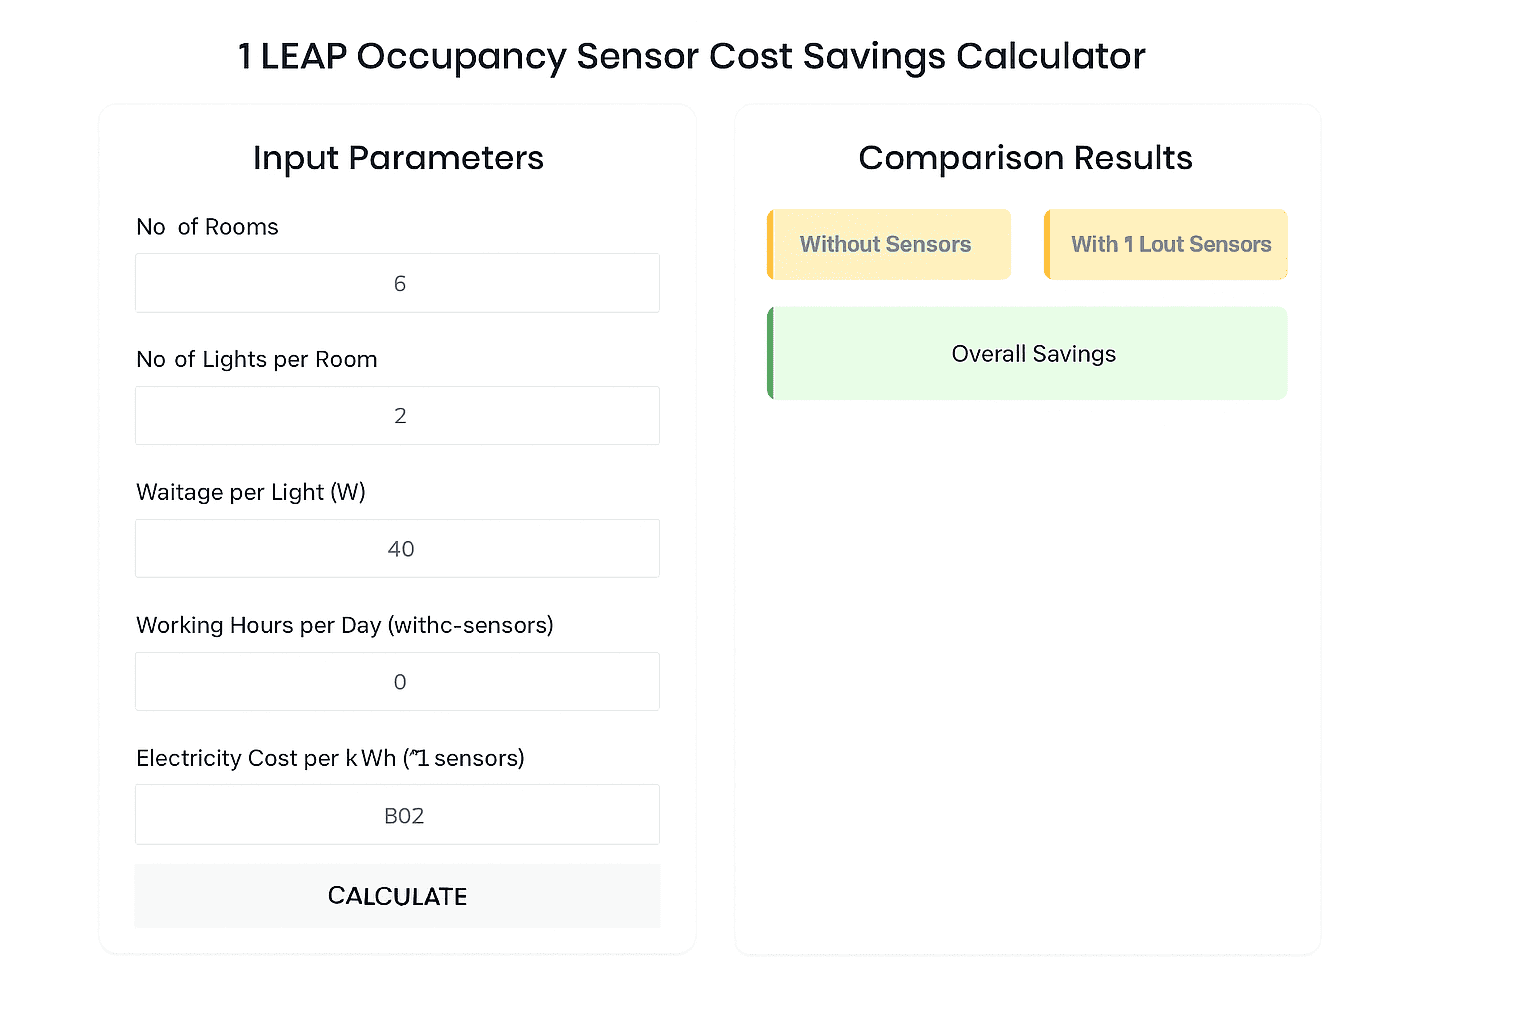
Infrared LED Sensor Lamp
Welcome to use 1L-HS03 Infrared LED Sensor Lamp!
The product is an energy-saving automatic sensor lamp, adopting integrated circuit and precise detecting components. It gathers automatism, convenience, safety, saving-energy and practical functions. Its performance is stable. It can identify day and night. The lamp can turn on when one enters detection field and can turn off automatically when one leaves detection field.
The 180° Wall Mount PIR Sensor Switch detects the Infrared Rays released by the human body. The light or any other electrical appliance can be activated automatically by the active presence of a human body within the detection range/coverage area & when there is no active human presence the light will be deactivated automatically. An adjustable time knob lets you select how long the light stays on after activation. Hence a considerable amount of electricity cost is saved by the use of Sensor.

1L-HS03
Specifications:-
- Operating Volt: 220-240V/AC
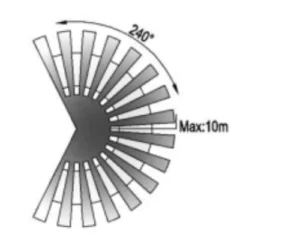
- Detection Range: 240°
- Power Frequency: 50/60Hz
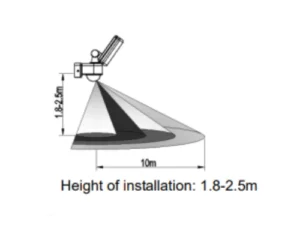
- Detection Distance: 5-10m(<24℃)adjustable
- Ambient Light: <3-2000LUX (adjustable)
- Working Temperature: -20~+40℃
- Time Delay: Min.10sec±3sec
- Working Humidity: <93%RH
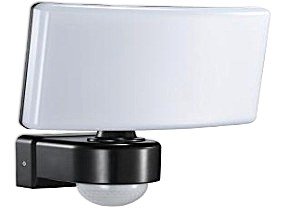
- Installation Height: 1.8-2.5m
- Rated Load: 30W (2200LM)
- Detection Moving Speed: 0.6-1.5m/s
- Additional switching capacity: 500W
- IP Class: IP65
Functions:-
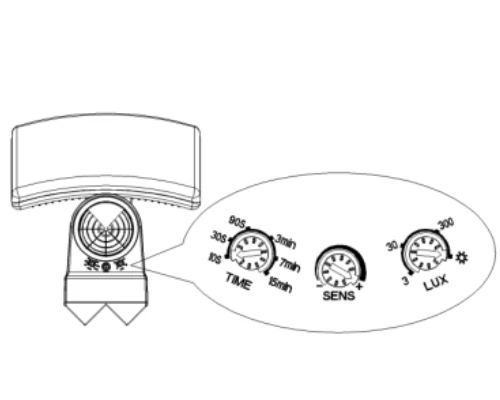
- Can identify day and night: The consumer can adjust working state in different ambient light. It can work in the daytime and at night when it is adjusted on the “sun” position (max). It can work in the ambient light less than 3LUX when it is adjusted on the “3” position (min). As for the adjustment pattern, please refer to the testing pattern.
- SENS adjustable: It can be adjusted according to using location. The detection distance of low sensitivity could be only 5m and high sensitivity could be 10m which fits for large room
- Time-Delay is added continually: When it receives the second induction signals within the first induction, it will restart to time from the moment
- Adjustable Time Delay: the length of time delay could be set according to the customers’ requirement, the minimum time of this item is 10sec ± 3sec, the maximum is 15min±2min.

Installation:-
- Switch off the power
- Screw off the nail on the bottom of sensor lamp and unload the bottom. Open the wire hole in the bottom and pass the wire through the hole
- Fix the bottom on the selected position with the inflated screw
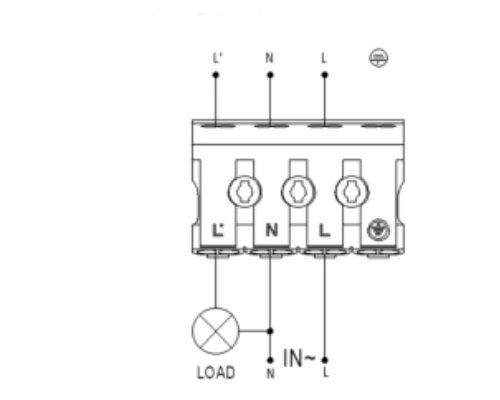
- Connect the power wire into connection-wire column according to the connection-wire diagram.
- Fix back the sensor lamp on the bottom. Switch on the power and then you can test it.
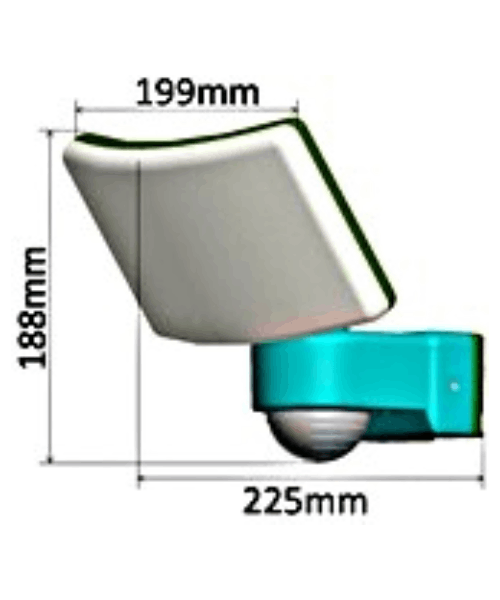
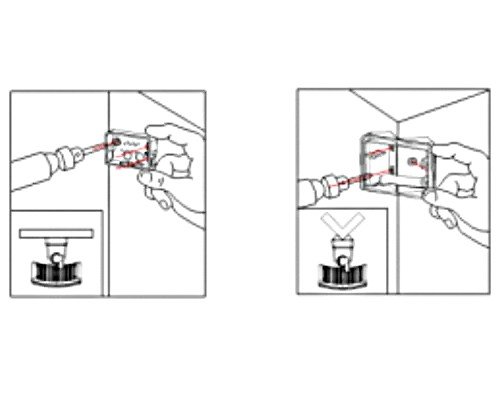
- It not only can install on the wall directly but also can install in the outer corner with the help of the widget (refer to photograph below):
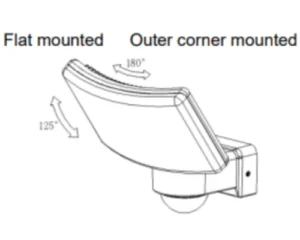
The LED can tilt up/down, turn left/right according to the customers’ requirement as the right drawing:
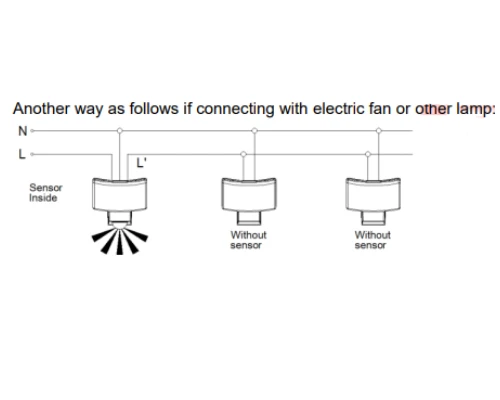
Connection Wire Diagram :-
Sensor information :-
Test:-
- Turn the SENS knob clockwise on the maximum (+). Turn the TIME knob anti-clockwise on the minimum (10s). Turn the LUX knob clockwise on the maximum (sun
- Switch on the power; the lamp will have no signal at the beginning. After Warm-up 30sec, the lamp can start work. If it receives the induction signal, the lamp will turn on. While there is no another induction signal any more, the lamp should stop working within 10sec±3sec
- Turn LUX knob anti-clockwise on the minimum (3). If the ambient light is more than 3LUX, the lamp should not work. If you cover the detection window with the opaque objects (towel etc), the lamp would work. Under no induction signal condition, the lamp should stop working within 10sec±3sec
Note: when testing in daylight, please turn LUX knob to (SUN) position, otherwise the sensor lamp could not work!
Note:-
- Should be installed by electrician or experienced person;
- Avoid installing it on the uneven object;
- There should be no hindrance and moving objects in front of the detection windows to affect detection;
- Avoid installing it near air temperature alteration zones such as air condition, central heating, etc;
- Considering your safety, please do not open the cover when you find the hitch after installation;
- If there is difference between instruction and the function the product has, please give priority to product and sorry not to inform you additionally.
Some Problem And Solved Away:-
The load does not work:
- Please check if the connection of power source and load is correct.
- Please check if the load is good
- Please check if the settings of working light correspond to ambient light.
The sensitivity is poor:
- Please check if there is any hindrance in front of the detector to affect it to receive the signals.
- Please check if the ambient temperature is too high.
- Please check if the induction signal source is in the detection field
- Please check if the installation height corresponds to the height required in the instruction.
- Please check if the moving orientation is correct
The sensor can not shut off the load automatically:
- Please check if there is continual signal in the detection field.
- Please check if the time delay is set to the maximum position
- Please check if the power corresponds to the instruction.