Model — 1L-PS02
Introducing the 360° False Ceiling Mount PIR Sensor – a fully automatic indoor light controller that seamlessly combines security with energy efficiency. Capable of managing up to 1200W, this smart switch features a highly sensitive, integrated circuit that keeps your space safe and well-lit. When night falls, its built-in passive infrared (PIR) sensor springs into action, illuminating your surroundings the moment it detects movement. Come daylight, an intuitive photocell sensor steps in to turn off the lights, ensuring that energy is saved when it’s not needed. It’s modern technology with a timeless touch—keeping your space bright when it matters and conserving energy when it doesn’t.

Specifications
- Operating Voltage: 220-250VAC/50Hz
- Load Capacity: 300W (standard) / 1200W (maximum)
- Ambient Light Range: 3-2000 (Adjustable)
- Load Type Compatibility: Bulbs, LED lights, CFLs, Fans, etc.
- Detection Distance: 10-12 meters
- Detection Angle: 360°
- Installation Height: 2.2-4 meters
- Motion Detection Speed: 0.6-1 m/s
- Power Consumption: 0.1W (static) & 0.4W (working)
- Working Humidity: Less than 93% RH
- Adjustable Delay: 10 seconds to 7 minutes
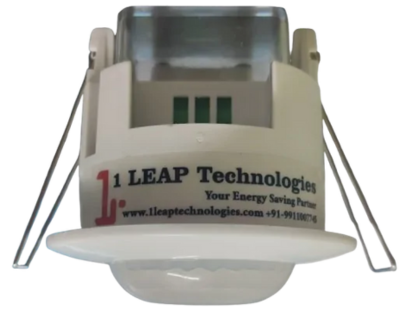
1L-PS02 – False Ceiling Mount PIR Sensor 360°
Key Features of the 360° Ceiling Mount PIR Motion Sensor
- 360° Motion Detection: Captures infrared rays from every angle for comprehensive coverage.
- Built-in Photocell: Automatically distinguishes day from night, keeping energy use in check.
- LUX & Time Control: Adjustable controls let you tailor the light intensity and duration—set it, forget it, and save!
- Re-trigger Function: Every new detection resets the timer, ensuring continuous illumination when needed.
- Adjustable Time Delay: From a brisk 10 seconds (±3 sec) to a leisurely 7 minutes (±2 min), choose your preferred timing.
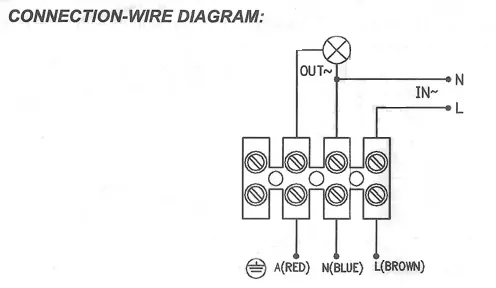
- Stand-alone 220V AC Operation: No complicated wiring—just plug in and start saving.
- DIY Friendly Installation: Designed for ease-of-use, perfect for the do-it-yourself enthusiast who appreciates both tradition and innovation.
Troubleshooting and Solutions:
Load Not Functioning:
- Ensure the power source and load are connected correctly.
- Check if the load is operational.
- Adjust the working light settings to match ambient light conditions.
Weak Sensitivity
- Remove any obstacles blocking the sensor’s signal reception.
- Reduce the ambient temperature if it is too high.
- Make sure the detection field includes the induction signal source.
- Install the sensor at the recommended height as per the instructions.
- Move in the correct direction for optimal detection.
Sensor Fails to Turn Off the Load Automatically:
- Check for continuous signals in the detection field.
- Adjust the time delay setting if it is at the maximum.
- Verify that the power supply matches the specified requirements.
- Install the sensor at the recommended height as per the instructions.
Installation Tips Ceiling Mount PIR Sensor 360° :
Since the detector reacts to temperature changes, avoid the following:
- Do not point the detector towards highly reflective surfaces, such as mirrors.
- Avoid installing the detector near heat sources, like heating vents, air conditioning units, or lights.
- Do not direct the detector towards objects that may move with the wind, such as curtains or tall plants.