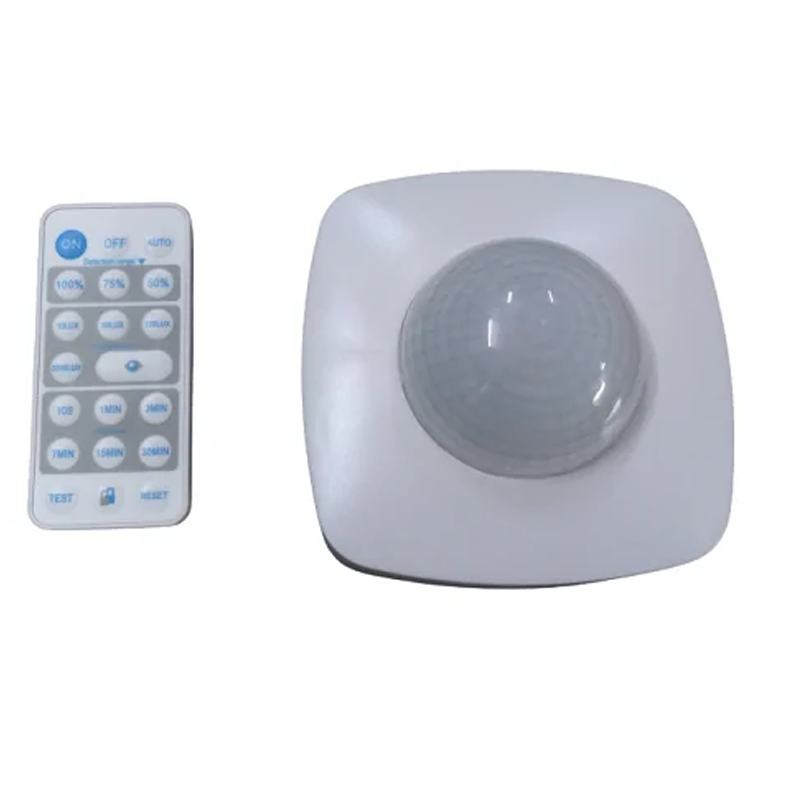
1L-PS06 – 360° Ceiling Mount Occupancy Sensor with IR Remote
The 1L-PS06 – 360° Ceiling Mount Occupancy Sensor with IR Remote is a micro-motion–based lighting automation device designed for modern residential, commercial, and industrial interiors. Made with modern PIR sensing technology, this Occupancy Sensor provides accurate motion detection, energy savings, and easy remote-controlled operation—making it an ideal solution for smart building automation.
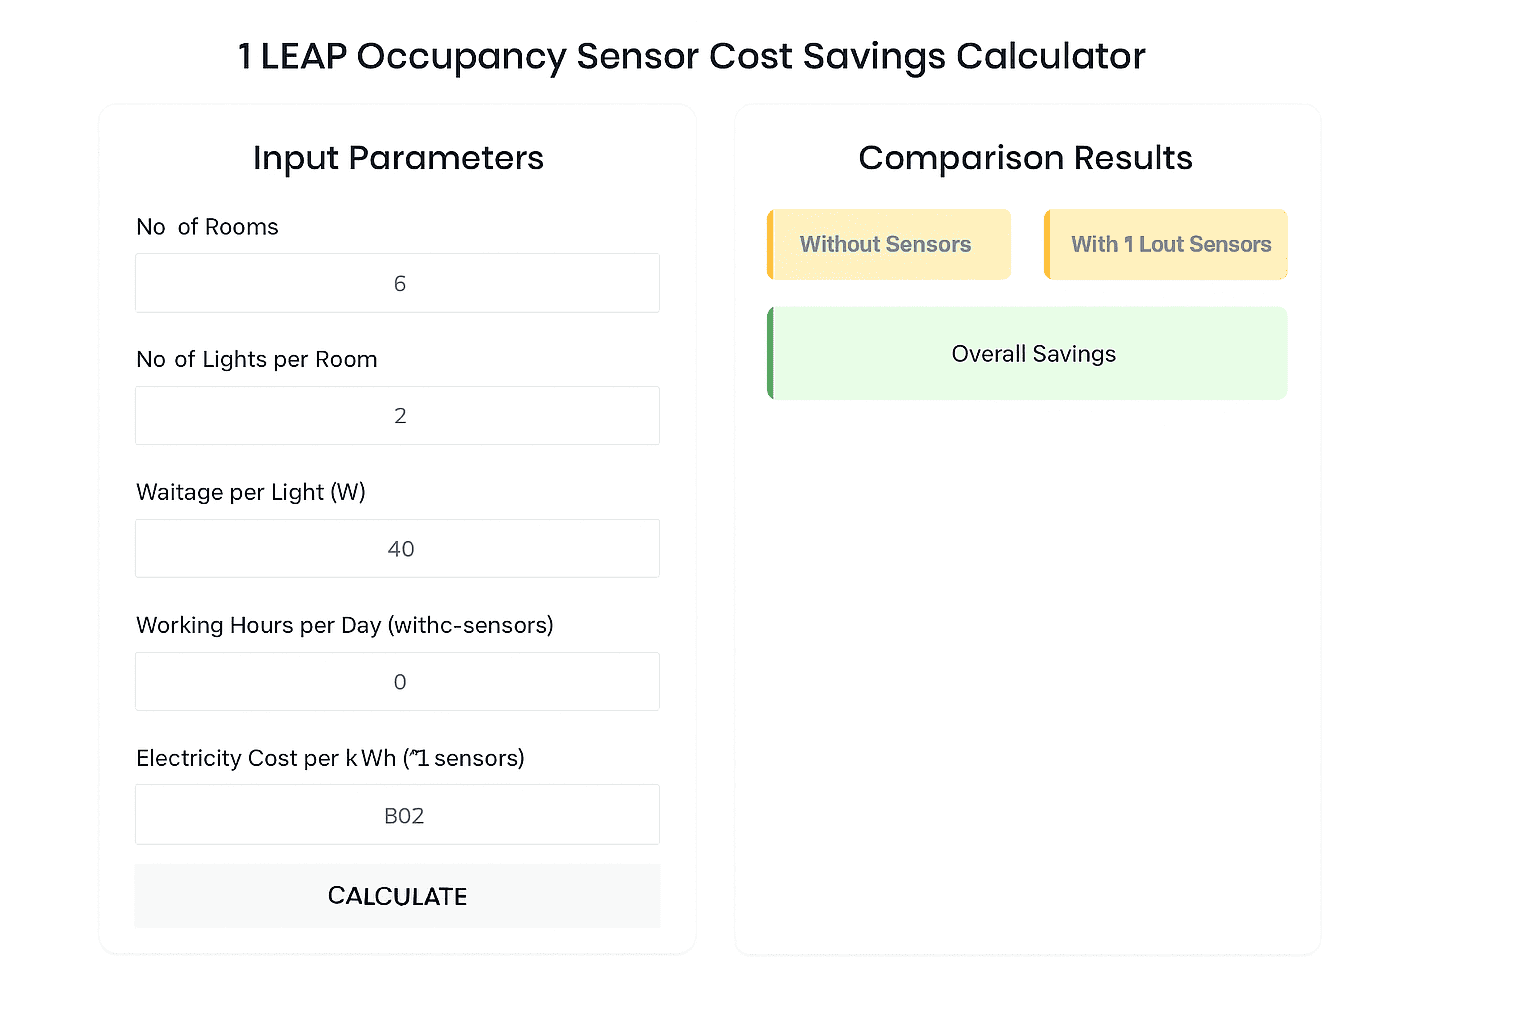
Whether you are upgrading an office, conference room, retail outlet, school, or home, this device will helps you in reduce electricity wastage by switching lights ON only when motion is detected and OFF when the space is unoccupied.
As a trusted Ceiling Mount Occupancy Sensor Dealer In Delhi, we makes sure the authentic, high-performance automation products that provides you the results in real-world environments.
1L-PS06 – 360° Ceiling Mount Occupancy Sensor
Sensor Specifications
Specification | Details |
|---|---|
Power Source | 220-240V/AC |
Power Frequency | 50Hz |
Rated Load | Max. 2000W (1000W for LED) |
Power Consumption | Approx. 0.5W |
Detection Angle | 360° |
Detection Range | 50%, 75%, 100% (Adjustable) |
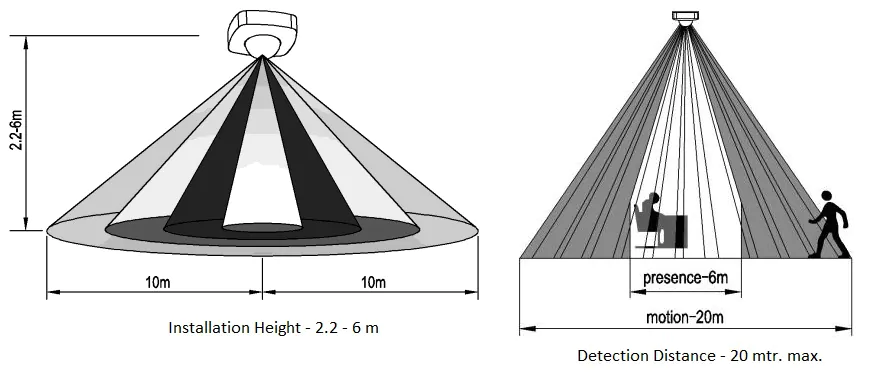
Detection Distance | Max. 20m (<24℃) |
Detection Moving Speed | 0.6-1.5m/s |
1L-PS06 – 360° Occupancy Sensor with Remote
Occupancy Sensor Connection Dig.
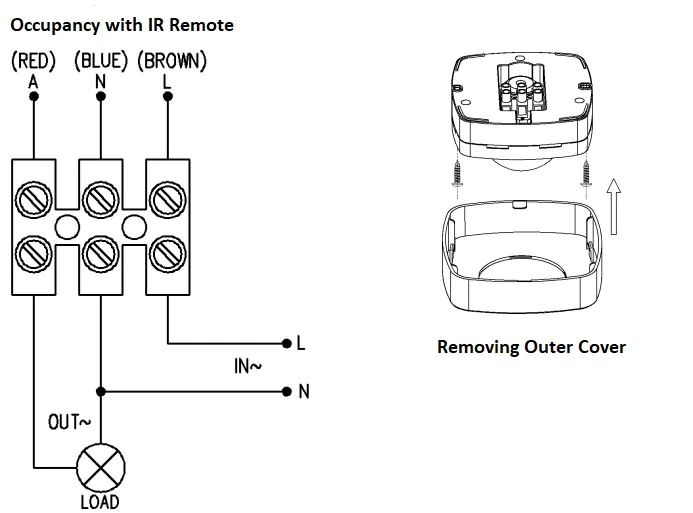
Occupancy Sensor with IR Remote
Please Note:
- The default (factory) settings are a 30-minute hold time and a sensitivity of 2000 LUX.
- Upon powering up, the sensor and its connected lamp will initially be inactive. After a 15-second warm-up period, the sensor will become operational.
- Press the “RESET” button to restore the factory settings.
Battery Replacement Instructions
- Step 1: Remove the battery holder.
- Step 2: Insert a new 3V battery.

Product Overview
The 1L-PS06 is a micro-motion detection sensor that identifies even the slightest movement—such as a person’s hand or head motion it makes sure that the lighting stays ON as long as the room is occupied. It supports both 2000W incandescent and 1000W fluorescent lighting loads, making it suitable for different applications.
This model supports IR remote control (depending on the purchased package), enabling you to switch between Auto, ON, and OFF modes with ease. With its ultra-wide 360° detection angle, it makes sure the complete coverage in any indoor environment.
If you are looking for genuine automation hardware, we are recognized as a top Energy Saving Occupancy Controller Dealer In Delhi providing genuine, high-quality controllers.
Key Features
360° PIR Motion Detection
Covers the whole room with a full 360-degree detection angle, making sure that no blind spots leave.
Micro-Motion & Walk-Across Sensing
- 3m micro-motion radius (ideal for desks, workstations, study areas)
- 6m walk-across motion radius at 2.5m mounting height
IR Remote Operation
Supports three remote functions
- Auto – Motion + ambient light based automation
- ON – Continuous lighting
- OFF – Manual light shutdown
Remote channel selection allows the multiple sensors in the same room to work without interference.
Adjustable Time & LUX Settings
- Time Delay: 5 seconds to 15 minutes
- Lux Range: 10 – 500 Lux
This ensures customized automation based on occupancy and available daylight.
Energy Efficient & Smart
Designed to reduce electricity usage by automatically turning lights off when no movement is detected.
Installation Insights
The sensor is designed for ceiling installation only and should be mounted indoors. It requires proper wiring to the power supply and uses a decorative cover and base plate for secure and aesthetic installation. A drill, screwdriver, and standard tools are required.
The wiring includes:
- Live (Brown) → “L” terminal
- Neutral (Blue) → “N” terminal
- Lamp Load → “LS” terminal
Two knockout holes are provided for wiring convenience.
Applications
The 1L-PS06 Occupancy Sensor is suitable for:
- Office Cabins & Conference Rooms
- Workstations & Study Rooms
- Hallways & Corridors
- Restrooms
- Retail Shops & Showrooms
- Residential Living Areas
- Schools & Libraries
- Industrial Indoor Spaces
Some Problems and Their Solutions:
If the load does not work:
- Check the power and load wiring connections.
- Verify that the load is functioning properly.
- Ensure that the working light settings match the ambient light conditions.
If the sensor’s sensitivity is poor:
- Remove any obstructions in front of the detection window.
- Verify that the ambient temperature is not too high.
- Confirm that the induction signal source is within the detection field.
- Ensure that the installation height matches the height specified in the instructions.
- Verify that the moving orientation is correct.
If the sensor does not automatically shut off the load:
- Check for continuous signals in the detection field.
- Verify that the time delay is not set to the maximum duration.
- Ensure that the power supply meets the specified requirements.
In summary, the 1L-PS06 – 360° Ceiling Mount Occupancy Sensor with Remote offers an advanced, energy-efficient solution for indoor security and courtesy lighting. With its full 360° detection, adjustable settings via the IR remote, and reliable performance even in varying environmental conditions, it stands as a robust, user-friendly controller ideal for modern spaces. Enjoy streamlined installation, precise motion sensing, and customizable operation—all designed to enhance safety and energy savings.
Why Choose Us?
As a premium Ceiling Mount Occupancy Sensor Dealer In Delhi, we supply the best-quality automation devices with the complete technical details, genuine specifications, and reliable performance. Businesses and homeowners over the city trust us as their preferred Energy Saving Occupancy Controller Dealer In Delhi for dependable service and support.
Conclusion
The 1L-PS06 Occupancy Sensor is a powerful, and user-friendly device that helps in reducing the energy wastage. With its modern detection capabilities and IR remote control, it is one of the most well-known solution for modern automation needs. If you are searching for a reliable Ceiling Mount Occupancy Sensor Dealer In Delhi or require high-quality automation hardware, this model is an excellent choice.

